Back to article
3341
Replacing your lenses
Replacement lenses are available in different colors as accessories for your Bose Frames. Find out how to remove the lenses from your Frames and insert replacements.
Before you begin:
We recommend using the included cloth when touching the lens to avoid scratches. Place a towel on a sturdy surface in case you accidentally drop a lens.
IMPORTANT: Only the following Frames have been tested and approved for prescription lenses in all regions globally:
IMPORTANT: Only the following Frames have been tested and approved for prescription lenses in all regions globally:
- Tempo
- Tenor
- Soprano
Replacing the lenses:
Removing lenses
- Place a towel on a sturdy surface in case you accidentally drop a lens
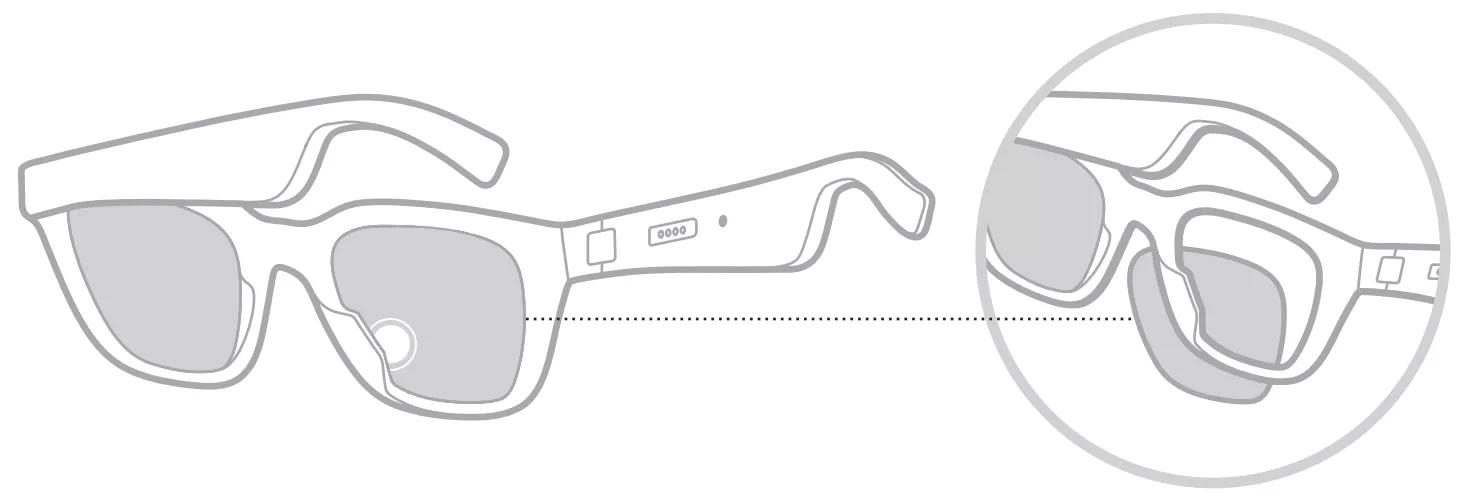
- To remove a lens, hold the Frames so they face away from you
- Place your thumbs in the bottom corner closest to the bridge
- Press firmly until the entire lens pops out from the frames
Note: The lenses are made to be replaced, and some pressure is required to remove them.
Inserting lenses
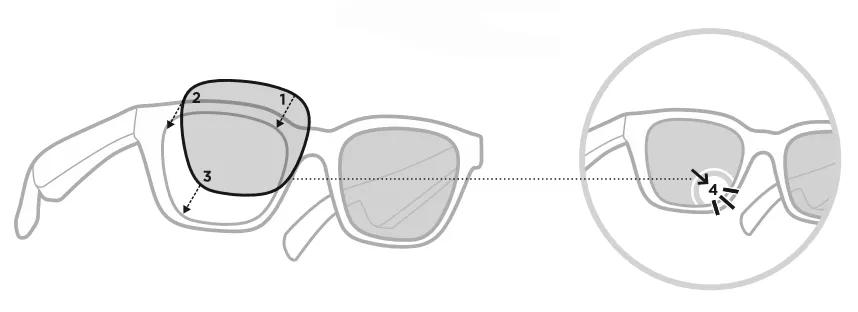
- To replace a lens, hold the Frames so they face you
- Remove the lenses from the packaging, making note which is the left lens and which is the right lens
- Insert the lens to the appropriate side of the Frames, then apply pressure in this order:
- Start with the top corner closest to the bridge
- Proceed to the other top corner
- Press the corner below that
- Press the bottom corner closest to the bridge
Was this article helpful?
Thank you for your feedback!


